
In today’s competitive market, having a web presence for your dance studio is important. Dance studio advertising ideas that are cost-effective are highly sought after. The same goes for instructors looking to get more exposure. Once you have a web presence , putting up good content to keep people informed and engaged is your best bet to keep marketing costs low.
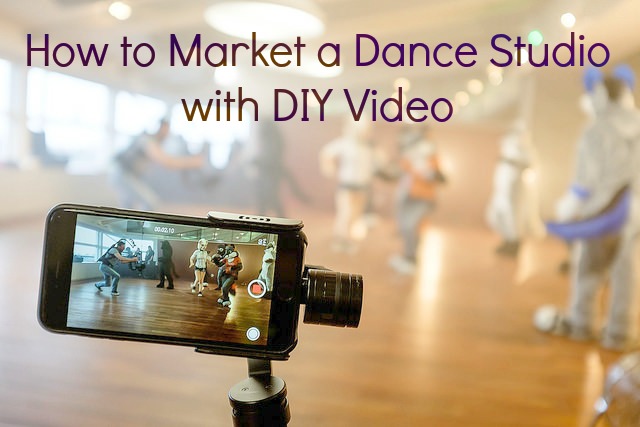
Videos are a great way to promote your studio and classes. Hiring a professional production company to create some high profile videos is a good investment. However, that can become expensive. Cut costs by creating videos yourself. Here we provide dance marketing video DIY instructions to help set you apart from your competition.
Have a plan
Any good video producer will tell you how important it is to have a plan before you shoot anything. Know what you will want to show or the story you want to tell. Sometimes, scripting it on paper helps in the effort. Whatever you do ahead of time will save you hours of time when it comes to shooting and editing.
Keep it short
While you might shoot a 10-minute video of a dance rehearsal, there are few people who will watch it once you post it on your website. The attention span of most viewers is approximately less than one minute. Thus, the most impactful videos are those that are short and sweet. You want to create “eye candy” that pulls in your viewer, especially if you are hoping to engage a prospective customer. Here are video formats and guidelines for time:
- Tutorial: 45 to 90 seconds
- Demonstration: 1 to 3 minutes
- Testimonial: 30 seconds or less
- Promotional videos/commercials: 15 to 59 seconds
Remember that you do not want to say or show everything. Keep it very focused and to the point. If you create a commercial, make it engaging and not just a straight-forward sell. Be creative, tell a story or intriguing situation. Think about tapping into emotions. That is what engages viewers. Telling them to buy, buy, buy (or join the studio and become a student) is off-putting.
Keep the venue in mind
Of course shooting within the studio is ideal. Just because it makes a great dance space doesn’t immediately make it a great video space. Consider the following:
- Space. There must be enough room to allow for the dancer or dancers and the camera operator. Dancers will need room to move freely. Distance is needed in order for the camera operator to clearly show what is intended. For example, you don’t want to show just the top half of the dancers. You want to see their feet as well. Make sure there is enough space to capture all the action.
- Background. Filming in front of mirrors isn’t a horrible concept, but be sure the camera does not reflect in the mirror. You don’t want to distract viewers from the dancer. With other videos you create, always be sure the background is tidy and pleasing to the eyes. In an interview setting, put a solid background behind the subject. Keep props such as plants or signage to a minimum.
- Light. Sophisticated equipment is often required to film in poor light conditions. Phones, iPads and other similar devices can’t always correct videos shot in low light. If you plan to shoot a number of promotional videos, consider investing in a small light kit. They can be as inexpensive as $20 and are available at most photo shops or stores where you purchase video equipment.
Shoot in landscape
Mobile phones and other handheld devices have become more advanced and are ideal for DIY videos. When using this kind of equipment, remember to shoot with the phone in a horizontal position; do not shoot holding the device vertically. If you do, it will create black strips on either side of the video when you post it on your website or social media.
Use a tripod
Stability in the video is an easy step that immediately sets you apart. No viewer enjoys shaky video. No human can successfully keep a camera steady for long just by holding it in his or her hand.
Even if you are not using an expensive camera, but instead opt for a mobile phone or iPad, purchase a tripod. They are relatively inexpensive, easy to attach to devices and make video look much more professional.
Additionally, a hand grip can be purchased and attached to a mobile phone or a sport camera, such as a GoPro. This helps with stability during moving shots.
Sound matters
Bad visuals turn a viewer away. But even more important is the sound. Viewers become annoyed and video becomes less appealing when the sound quality is bad.
If shooting DIY videos with a mobile device, consider investing in an inexpensive external microphone to capture audio. This is especially important for interviews or testimonials. A lavalier microphone can cost as little as $30, but it prevents external noise from becoming distracting.
Testimonial videos
When studio owners think about shooting videos, action videos typically pop into mind. Of course you want to show dancers in action. Instructional videos are great because users will view and share them. However, testimonial videos can be very effective. Testimonials allow others to vouch for your hard work and show how clients have been influenced by you and your staff. Research has shown that testimonial videos impact buying decisions of customers. They can help your studio in positive ways as clients consider enrolling.
Think about conversations you have had with parents and students. Who has come up to you to rave about something that happened in class or how much they enjoyed an instructor? These are the people to tap for short and focused interviews. Here are some additional tips for creating a good testimonial video:
- Don’t be vague. Sure, you can get someone to say something nice about your studio, but a better testimonial explains the benefits of the studio and instruction. For example, it is nice if a parent states, “I really like Fancy Steps studio. It’s been a great place for my daughter.” A more effective testimonial is: “My daughter learned very quickly at Fancy Steps. The instructors really care about her, her progress and where she wants to go as a dancer.”
- Never create fake testimonials. Posting a fake is a sure fire way to ruin your credibility. It is better to have no testimonials on your website than to have a fake one. If you want to showcase your studio in the most positive light, use people who will provide honest and very real testimonials.
- Think about your audience. Yes, it’s great to have a testimonial from the parent of the best student you’ve ever had. It’s also nice to have one of your well-known and competition-winning dancers say how much they love the studio. Think about everyone you serve and everyone you hope to have as a future client. Consider getting testimonials from parents whose children loved coming to class every day, but were always out of step. These kinds of testimonials reveal that the average Joe is welcome, can learn and have fun and is an important part of your studio. Having a mom say on camera, “My son loves tap dancing. We know he has two left feet, but his instructor, Miss Debbie, is so patient with him, he enjoys every minute he’s here,” can be assuring to other parents who worry how their child might fit in.
Where to Post your Videos
First, put it on Youtube. You should create a Youtube account for your studio (or if you are an instructor at others’ studios, you can put this Youtube account in your name). This Youtube account will be tied to the Google+ page that is automatically created when you create your Google My Business page. I’m not trying to confuse you on this, so we’ll aim for an upcoming article on Google My Business. But there’s the list of where you then use your Youtube video link to post your video:
- studio’s or instructor’s website
- Google My Business listing
- Bing Local listing
- your social media pages
Good luck! Your first try might not win any prizes, but you’ll learn from it, and the second one will be better.